Web Analytics

ad

Showing posts with label windows tricks. Show all posts

Sunday, October 20, 2013

How to Recover Windows Administrator Password

How to Hack Windows Admin PasswordThis post will show you how to hack Windows administrator password at times when you forget it or when you want to gain access to a computer for which you do not know the password.
Most of us have experienced a situation where in we need to gain access to a computer which is password protected or at times we may forget the administrator password without which it becomes impossible to log in to the computer. So, if you are somewhat in a same kind of situation, here is an excellent hack using which you can reset the password or make the password empty (remove the password) so that you can gain administrator access to the computer.

Hacking the Windows Admin Password:

You can do this with a small tool called  Offline NT Password & Registry Editor. This utility works offline, that means you need to shut down your computer and boot off your using a floppy disk, CD or USB device (such as pen drive). The tool has the following features:
  • You do not need to know the old password to set a new one.
  • This tool can detect and unlock locked or disabled out user accounts!
  • There is also a registry editor and other registry utilities that works under linux/unix, and can be used for other things than password editing.

How it Works?

Most Windows operating systems stores the login passwords and other encrypted passwords in a file calledsam (Security Accounts Manager). This file can be usually found in \windows\system32\config. This file is a part of Windows registry and remains inaccessible as long as the OS is active. Hence, it is necessary that you boot off your computer and access this sam file via the boot menu. This tool intelligently gains access to this file and will reset/remove the password associated with administrator or any other account.
The download link for both CD and floppy drives along with the complete instructions is given below:
It is recommended that you download the CD version of the tool since the floppy drive is outdated or doesn’t exist in today’s computer. After the download, you’ll get a bootable image which you need to burn it onto a blank CD. Now, boot your computer from this CD and follow the screen instructions to reset the password.

Another Simple Way to Reset Non-Administrator Account Passwords:

Here is another simple way through which you can reset the password of any non-administrator accounts. The only requirement for this is that you need to have administrator privileges. Here is a step-by-step instruction to accomplish this task:
  1. Open the command prompt (Start -> Run -> type cmd -> Enter)
  2. Now type net user and hit Enter
  3. Now the system will show you a list of user accounts on the computer. Say for example, you need to reset the password of the account by name John, then do as follows:
  4. Type net user John * and hit Enter. Now, the system will ask you to enter the new password for the account. That’s it. Now you’ve successfully reset the password for John without knowing his old password.
So, in this way you can reset the password of any Windows account at times when you forget it so that you need not re-install your OS for any reason. I hope this helps.

How to Repair Windows Registry the Easy Way

This article explains how to inspect and repair the registry errors in your Windows PC so as to improve its overall performance. If you are a Windows user, you are most likely to be aware of the fact that the Windows registry gets corrupted over time resulting in an overall decreased performance of the computer.
At times, registry errors can also make your PC to freeze down and hang up every now and then causing a serious annoyance to the users. At this point, the registry needs a serious repair to bring the PC back to its life. Well, before I tell you how to repair the registry, lets see what causes the registry to get corrupted.
Registry errors may occur due to installing too many applications/software programs from time to time without verifying the publishers. This may create invalid entries in the registry hive leading to the errors. With the Internet boom and the era of freeware with free downloads, people often install programs from untrusted sources which results in a serious damage to the registry. Since the registry is a crucial component of the Windows operating system, damage to this can cause the system performance to drop down significantly.

Repairing the Corrupt Windows Registry: The Easy Way

The best and the easiest way to do this is by using a Registry Repair Tool (Registry Cleaner). This program will automatically scan the registry of your PC to find invalid entries and will fix them by removing the errors with in no time. A registry cleaner is the simple and safest solution to fix registry errors without the need to re-install the Windows.

Which Registry Cleaner is the Best?

Well, today there exists hundreds of Registry repair tools on the market and as a result, people often get confused at which one to go far. Hence, when it comes to the choice of Registry repair tool, we must be very selective since not all of them are the same.
On the Internet, there exists many such tools which are simply useless and doesn’t apply any significant fixes to the Windows registry. After trying many such useless products on my PC, I finally found one good product which actually made a magic to my PC performance. It is:
RegCure Pro – Boost Your PC Speed
RegCure Pro is one of the best and award winning registry cleaner tool that repairs registry to avoid PC errors such as unwanted shutdown, freezing, crashing and more. This tool will:
  • Repair the registry and increases your PC performance by upto 70%
  • Fix DLL errors and invalid shortcuts
  • Free up virtual memory to avoid error messages
  • Performs Defragmentation and Compression of the registry
  • Fix blue screen errors, system crashes, startup errors and more…
RegCure Pro is not just a Registry cleaner, rather it is a complete Optimization Toolkit for your PC. For more information on this program, you can visit the RegCure Pro Homepage.

Can I Manually Repair the Registry?

Windows registry has a very complex structure with hundreds of thousands of entries embedded in it. A corrupt registry may contain thousands of invalid entries and errors in it as a result of which, it is impractical and almost impossible to manually inspect, find and repair those errors. Also, manual registry repair involves serious risk and can lead to a total system breakdown if done improperly. Except you are a highly experienced Windows user or a Windows expert, you are not encouraged to tamper with the registry.
Hence, using a Repair tool is the safest and the easiest way to repair the registry errors and improve the overall performance of your PC. It is recommended that you periodically (daily or weekly) perform registry scans using these tools to repair the errors as and when they come up so that, you can keep your PC’s health at its best. Just repairing the Windows registry can make your PC blazing fast like never before!

Wednesday, October 16, 2013

BLUESTACK 25000 GRAPHIC CARD ERROR FIX


BLUESTACK IS ANOTHER ANDROID EMULATOR FOR PC JUST LIKE YOUWAVE..

BUT SOME PEOPLE FACE BLUESTACK MOST COMMON ERROR WHICH IS 25000 GRAPHIC ERROR.YOU GENERALLY FACED THIS ERROR BECAUSE OF YOUR OUTDATED GRAPHIC CARD WHICH IS NOT SUPPORTED BY BLUESTACK OR YOU HAVE TO UPDATE YOUR GAPHIC CARD.

FIRST TRY THESE METHOD TO SOLVE GRAPHIC ERROR..

1. RIGHT CLICK ON MY COMPUTER
2. CLICK ON PROPERTIES..
3. GOTO DEVICE MANAGER.
4. THAN FIND YOUR GRAPHIC CARD WHICH IS UNDER DISPLAY ADAPTER
5. RIGHT CLICK ON YOUR GRAPHIC CARD AND THAN CLIK ON UPDATE DRIVER SOFTWARE.

IF THERE IS ANY UPDATE AVVAILABLE FOR YOUR CARD THAN IT WILL AUTOMATICALLY UPDATED BUTIF YOU GRAPHIC CARD IS ALREADY UPDATE THAN YOU HAVE NO OTHER OPTION LEFT..

THE ONLY THING YOU CAN DO IS THAT DOWNLOAD HD VERSION OF BLUESTACK WHICH IS DEFINETLY SUPPORTED YOUR SYSTEM SPECS BUT THERE IS ONE LIMITATION OF HD BLUESTACK AND THAT IS YOU CANNOT RUN HIGH GRAPHIC APPS.. LIKE LINE , SUBWAY SURFERS , ANGRY BIRDS LIKE APPS BUT YOU CAN RUN WHATSAPP ON IT ..
SO HERE'S THE LINK :   DOWNLOAD


ENJOY!!
AND DONT FORGET TO SHARE US AND KEEP COMMENTING.... 

YOUWAVE FULL VERSION PATCH FILE


YOUWAVE IS A ANDROID EMULATOR FOR PC WHICH HELPS YOU TO RUN ANDROIDE BASE APPS LIKE GOOGLE PLAYSTORE, WHATSAPP, LINE , SUBWAY SURFER AND MANY MORE ANDROID APPS..

BUT THIS YOUWAVE SERVICE IS NOT FREE YOU HAVE TO PAY FOR IT ...YOUWAVE ONLY PROVIDE YOU 10 DAYS TRIAL VERSION

THAT'S WHY ON DEMAND OF PEOPLE I MADE A CRACK FILE FOR YOUWAVE HOME EDITION WHICH PATCH THE YOUWAVE TRIAL VERSION INTO FULL VERSION...


HERE IS THE LINK :   DOWNLOAD

JUST EXTRACT THE FILE AND PASTE THE PATCH FILE IN YOUWAVE DIRECTORY..


PLEASE SHARE THIS WITH YOUR FRIEND AND FOLLOW US ON FACEBOOK AND DON'T FORGET TO COMMENT...

Saturday, September 28, 2013

How to Change the ICON of an EXECUTABLE file

Some times it becomes necessary to change the icon of an executable file so that the file gets a new appearance. Many of the tools such as TuneUP Winstyler does this job by adjusting the Windows to display a custom icon to the user. But, in reality if the file is carried to a different computer, then it shows its original icon itself.
This means that in order to permanently change the icon, it is necessary to modify the executable file and embed the icon inside the file itself. When this is done the executable file’s icon is changed permanently, so that even if you take file to a different computer it show’s a new icon.
For this purpose I have found a nice tool which will modidify the executable file and embed the icon of your choice into the file itself. ie: The tool changes the icon of the executable file permanently.

How to Change the Executable File Icon?

Here is a step-by-step instruction on how to use this tool to change the icon of any EXE file:
  1. Go to www.shelllabs.com and download the trial version of IconChanger and install it (Works on XP, Vista and Win 7).
  2. Run the IconChanger program from Start -> All Programs and you should see an interface as shown below:
    Change EXE File Icon
  3. Now you will see a window stating that “Choose an object whose icon you want to change”. Click on the “OK” button.
  4. Now select the executable file for which you wish to change the icon.
  5. Icon changer will automatically search for all the icons on your “C:\ drive” so that you can select any one of those. If your desired icon is not shown in the window, you may paste the path of your icon file in the field which says “Search icons in” so that your desired icon gets displayed.
  6. Select the ICON of your choice and click on Set button.
  7. Now a popup window will appear and ask you to select from either of these two options.
    • Change embeded icon.
    • Adjust Windows to display custom icon.
  8. Select the first option (Change embedded icon). You are done. The icon gets changed.

How to Enable or Disable Toast Notifications on Windows 8

Toast Notification
Windows 8 is among the most incredible and interesting kind of Windows version from Microsoft. It has visually eye catching design, which is found in modern user interface that is meant for redesigning a number of operating systems, worked out for users. If you have used or seen someone using Windows 8 you could have noticed the toast notifications in this modern version of windows, which simply appears the moment you install or uninstall any application. There are many users who are well versed with the bubble notifications, which were found in the earlier versions of Windows seen via the taskbar. The new application platform in Windows 8 comes with an integrated notification system for installing or uninstalling a number of modern applications.
The Windows 8 style application can employ a number of notifications types including the traditional toast notifications, live titles and lock screen. These can be managed by either disabling or enabling the notification of your application for certain accounts or simply silencing the notifications temporarily so that you are not often bugged by them. Unfortunately, this new version of Windows 8 simply doesn’t carry any notification center, which allows you to view the history of your notifications in just one place. The pop up notification of Windows 8 is very much transient wherein its lock screen application and live tiles portray a more permanent kind of notifications. Well, let’s check out the step by step tips to enable Toast Notifications found in Windows 8 as under:

Enabling Toast Notifications on Windows 8

You have a number of options when it comes to enabling or even disabling the Toast Notifications in Windows 8. This feature is very much beneficial; however, at times it can be annoying while you see them popping up time and again. Hence you have some simple ways to enable and disable the same. Once you have disabled it and after some time want to enable it, don’t get disheartened. Unlike the simple ways of disabling, the steps involved for enabling the toast notifications in Windows 8 too are very much simple. Let’s check them step by step.
Steps for Enabling Toast Notifications:
The users have the option to receive the toast notifications by simply changing the PC settings found over the OfficeScan client PC. This is the place where you have the option of enabling the toast notifications.
Step 1 – If you are keen to enable the same, the first step you need to do is to move the pointer of your mouse at the right corner of your screen just at the bottom side so that you end up displaying the Charms bar.
Step 2 – Once you carry out the first step, it’s time to move to the second, wherein you need to click at Settings and then to – “Change PC Settings” then you will see the PC Settings screen appearing before you.
Step 3 – Once you are done with the second step, it’s time to head on to the third step wherein you need to click over the option called “Notifications”. The moment you click over this section, you are supposed to choose the “On button” so that you enable the Toast Notifications in your Windows 8 based computer system.
Step 4 – This is the final step, wherein you have to choose on the option of “ON” to the three things. These include the “Show App Notifications”, “Play Notification Sounds” and the “Show Application Notifications” on the Lock Screen. The first one is mandatory while the last two are are optional and the choice to enable them is upto you.

Final Word

Microsoft has come up with this feature only in the latest versions of Windows – the Windows 8. However, if you are using operating systems like Windows 7, Windows XP or Windows Vista then make sure you do not have this notification to bug you. In your initial days, you may find a bit difficult doing whole lot of these steps as discussed above, hence it is vital to jot down all these steps in your notepad and start doing it as and when you need them. Doing them several amount of times can enable you to remember the same.
Windows 8 is a new and the most modern kind of operating system and hence different than the previous versions. You need some time to get accustomed to the same before you start using them proficiently. This certainly includes the enabling and disabling of the Toast Notifications.

Tuesday, August 13, 2013

How to Install Windows 7 From a USB Drive

Installing Windows from a USB flash drive has several advantages – First of all, the overall speed of the installation process will increase significantly, carrying a USB stick is much more convenient than a DVD, and finally it becomes possible to install the OS even on those systems that do not have a DVD drive, such as a netbook.
In this post, I will show you how to load the Windows installation on to your USB flash drive and make it bootable just like the DVD.

Tools Required to Load Windows 7 Installation Files:

  1. USB flash drive with a minimum capacity of 4 GB.
  2. Windows 7 set-up DVD.
Now, just follow the steps below:

Step-1:

Plug-in your USB flash drive and backup all the existing data in it.
Open the command prompt. If you are using Windows 7/Vista then open it with administrator rights.
ie: Go to Start -> All Programs -> Accessories -> Right-click on “Command Prompt” and select “Run as Administrator”.

Step-2:

In the command prompt, type in the following command:
DISKPART

Step-3:

Now issue the following command:
LIST DISK
This will show you a list of  available disks on your system. Disk 0 is usually the hard disk. In my case, Disk 5 is the USB drive (this can be a different one in your case). 
SELECT DISK 5

NOTE: In the above command, 5 is the USB drive number on my system. If you have a different number on your system, then you need to replace 5 with that number.

Step-4:

Now issue the following list of commands one by one as shown below:
CLEAN
CREATE PARTITION PRIMARY
SELECT PARTITION 1
ACTIVE
FORMAT FS=NTFS QUICK
ASSIGN
EXIT

Minimize the command prompt and proceed to the next step.

Step 5:

Insert the Windows 7/Vista installation disc and note down the “drive letter” of your DVD drive. In my case, it is “H:”. Now type the following list of commands as shown below:
H: CD BOOT
CD BOOT
BOOTSECT.EXE /NT60 M: (NOTE: M: is your USB drive letter)
EXIT

Step-6:

Copy the contents of your Windows 7/Vista installation disk into the USB flash drive.
That’s it! Your USB stick is now ready to boot and install the Windows 7 for you. Don’t forget to enable the “USB Boot” option and change the “boot priority to USB device from hard disk” in your BIOS settings.

Wednesday, July 10, 2013

HOW TO FIX CORRUPTED FILES IN XP

Sometimes when you are executing some program an error comes saying that your xxx file is corrupted so we can not run your program and your whole work is left pending due to that error. Now this problem will not arise because I will show you how to fix these corrupted files.

Required:

1. Windows XP operating system
2. Windows XP cd

Now, follow this steps:

1. Place the xp cd in your cd/dvd drive
2. Go to start
3. run
4. type in ‘sfc /scannow’ (without the ‘)

Now it should all load, and fix all your corrupted file on win XP.

Tuesday, July 9, 2013

Top 5 Inspiring Windows 7 Themes

1st of all you need to install rainmeter on your computer, for installing these themes, rainmeter is best desktop customization software, download rainmeter from here, these themes are Made for windows 7, but you can use it on windows xp too.


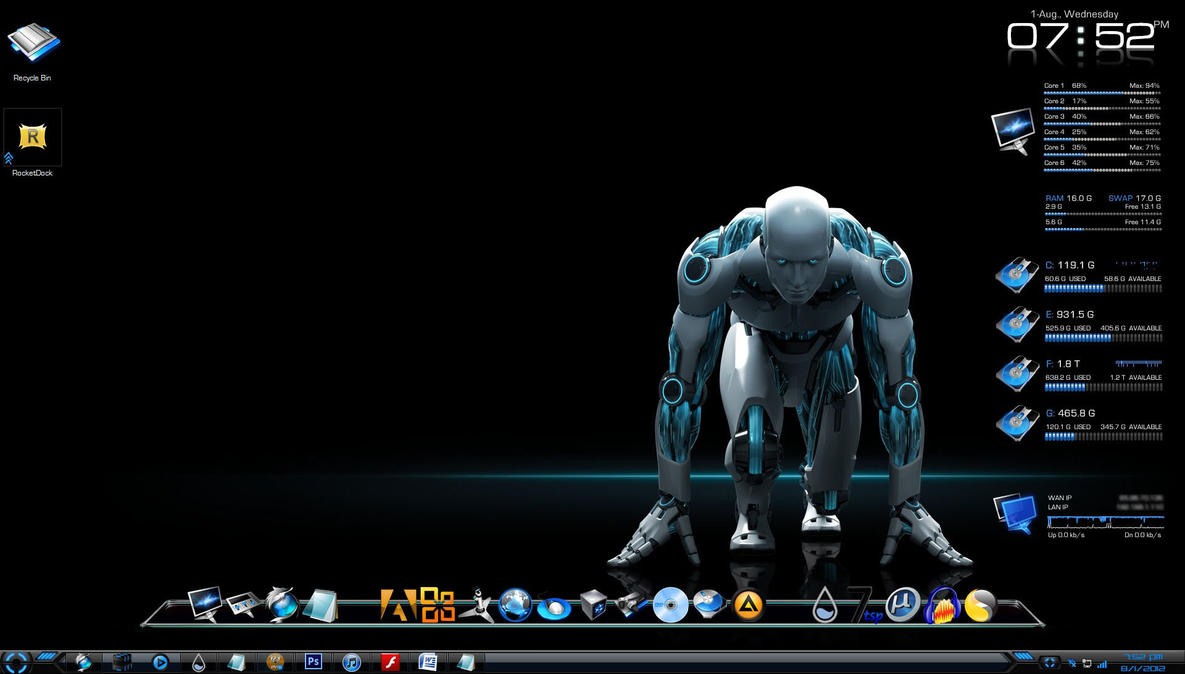
1-  BlueVision Alpha
Blue vision aplha v2.0 is one of the best rainmeter skins, you'll Get lot of attractive widgets in this theme, you can make it more awesome by changing background.
blue+vision+alpha.jpg (1167×647) 
Download

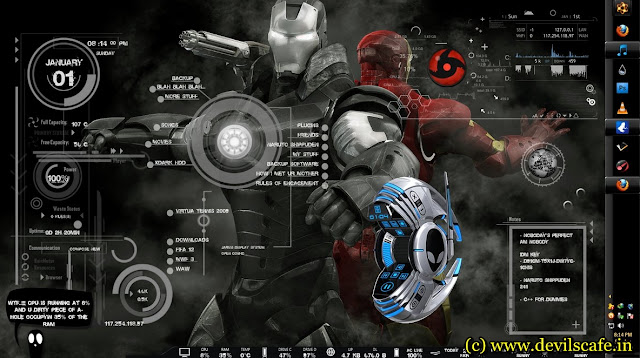
2- Jarvis (iRon Man Skin)
Jarvis is a Iron main inspired rainmeter skin, you can convert into hackers theme using new widgets and changing background image,Jarvis skin's centrel interface is damn cool.
 
Download

3-Tron Legacy ( 3D desktop )
 
download

4- Alien 3d Rainmeter Skin
alien 3d is amazing skin, it will give a 3d Look to your desktop
 
Download

5- Blue HDD
 
Download

Experiment : You can Make your desktop more amazing and awesome, by merging all skins's widgets/pulgins together , take a look, i've made it with blue vision alpha and jarvis

How To Install These Themes :

There are two ways to install
Rainmeter skins which are
Automatically and Manually. If
you have a Rainmeter skin with
extension .rmskin then you
automatically install the skins
with double click. Again you have
a skin with extension
like .zip/.rar/.7z archive then you
have unzip the skin archive put
the unzipped files into the
Rainmeter skin folder. Here I’m
going to show the two ways to
install Rainmeter skins.
Install Rainmeter Skins
Automatically
You can easily install a Rainmeter
skin automatically if it comes
with extension .rmskin.
The .rmskin is a skin format of
Rainmeter skin packager.
The .rmskin skin extension is
associated with Rainmeter skin
installer so, when you double
the skin it get installed
automatically.
Generally a Rainmeter skin
with .rmskin extension may
contain different components if
the author of the skin associate
those components. These
components may include Skins,
Layouts, Plugins, Fonts, Addons
and so on.
Install Rainmeter Skins
Manually
Rainmeter skins which comes in
a archive with extension like
.zip/.rar/.7z and other. To install
these types of skins you have to
unzip the skin archive. To extract
the skin archive you must have a
archive extractor installed on
your computer. You can use
Winrar, 7-Zip or other software
to extract the skin archive. After
extracting the skin archive copy
the extracted folder paste into
the Rainmeter skin directory. You
access Rainmeter skin directory
following the path below:
Windows 7: C:
UsersYourNameDocumentsRain
meterSkins Windows XP:
C:Documents and
SettingsYourNameMy
DocumentsRainmeterSkins
Finally, right-click the Rainmeter
icon from the notification area
and select Refresh all. The new
skins you installed will now be
available to load from the
Manage window or context
menus.
//